29.7K
Downloads
198
Episodes
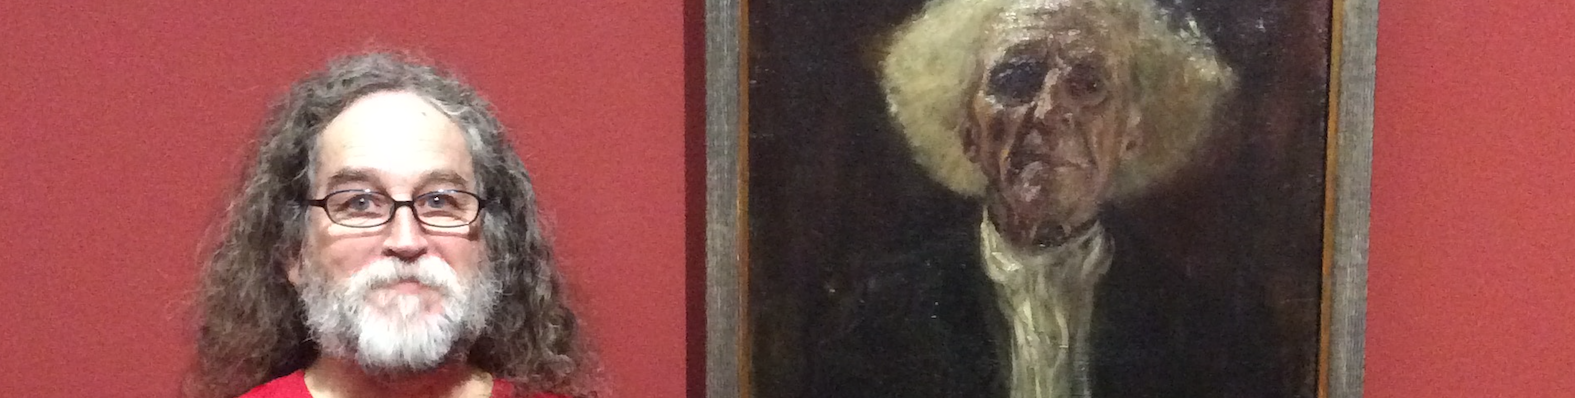
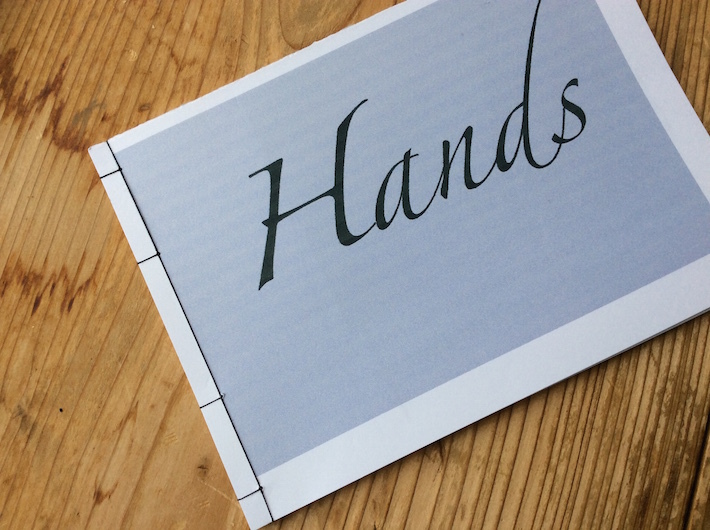
Creating Handmade Books and Writing Fiction in Kanazawa, Japan 金沢市
Episodes
Sunday Aug 07, 2016
Sunday Aug 07, 2016


Friday Jul 29, 2016
Friday Jul 29, 2016

- The black page
- Digressions galore. I mean Lots of tangents and ‘side notes’ which can last Chapter after Chapter.
- Typographical quirkiness. The black page, the noses, the squiggles, the marbled pages in the middle rather than as endpapers, the ten blank pages the printer refused to insert so the page numbers just jump ahead ten pages.
- Amazingly colorful characters - Toby, Trim, Yorick (of course)
Thursday Jul 28, 2016
Thursday Jul 28, 2016
- Putting Tristram Shandy by Laurence Sterne on computer, in InDesign & iBooks Author readying them (Nine Volumes) for release in iBooks and other epub related venues
- Putting my Calvado Pentology on the same computer programs for the same venues
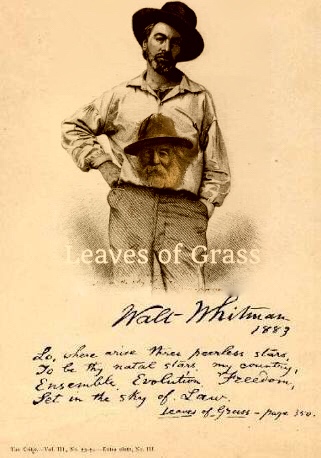
- Putting Leaves of Grass by Walt Whitman on the same for the same.
Wednesday Jul 13, 2016
Wednesday Jul 13, 2016
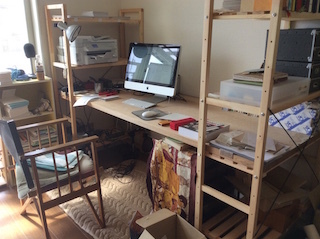
What I have been up to these last few months. First, I rented a space that I hope will encourage more production of books. I could call it a studio. And it has encourage more production of books, actually. I have limited time here (before and after other responsibilities) so rather than lounge around thinking, I do. Good fun.
Second, I thought about, designed, computerized, made, and showed a touristy book for tourists to places that might have some tourists. They didn’t think it was terrible and my pricing was spot on, according to them. This was good.

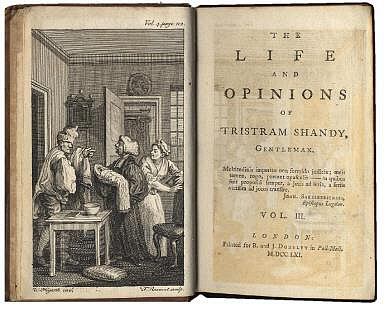
Third, I have been putting Laurence Sterne’s Tristram Shandy on InDesign so I can print it out and make books. My original intent was to computerize it, make ebooks, sell them on Amazon and iBooks, & etc. And simultaneously make books, too. But then I realized that iBooks has some Very nice editions on sale. As does Amazon, of course. I might put my version up as well, to see if anything comes of all my work. If I do and if anyone purchases my version over, say, Penguin’s version, I’ll probably invest my income in Kiva.
Lastly, I started out to make a book about Canals. Like the ones that used to be on Mars according to Percival Lowell and Edgar Rice Burroughs. But I ended up writing and making a book (Yotsume toji binding, about B6 in size.) about… I’m not sure. Science. Time. The shift from Geocentric thought to Heliocentric thought. Peopled by Kepler, Brahe, Copernicus, Nicholas of Cusa (who?), and Virginia Galilei.
Wednesday Jun 29, 2016
Wednesday Jun 29, 2016
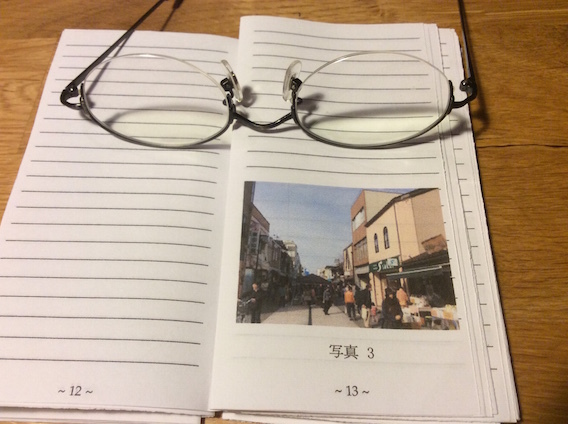
If tourists have my little book, they can find these places, photograph them themselves, and enjoy a little bit more than the usual touristy spots. Maybe someday I'll put a picture or two up.
Wednesday Jun 08, 2016
Wednesday Jun 08, 2016
- Kutani-yaki (a colorful style of pottery),
- Wajima-nuri (a black & white style of lacquerware),
- Kaga-Yuzen (fabric dyeing),
- Washi (paper),
- Wagashi (Japanese-style sweets),
- Kinpaku (gold-leaf painting), and
- Matsudaira Sadanobu a politician who may have named Kanazawa's famous garden, Kenrokuen, Kenrokuen.
Saturday May 07, 2016
Saturday May 07, 2016
Sunday Apr 17, 2016
Sunday Apr 17, 2016
Thursday Jun 11, 2015
Thursday Jun 11, 2015
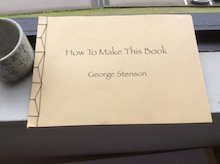 Here is How to Make this Book, an 18-page B6-sized pamphlet using the Hemp Leaf Binding. If you go to Episode 133 you can read a tutorial on this binding. The book is a combination history lesson about the empresses of Japan; there have been only eight. However, two of the empresses (Suiko and Koken/Shotoku) were instrumental in developing printing, book making, and writing in Japan.
 Suiko sent the people to China who brought back the writing system Japan still uses. Koken/Shotoku (the same woman was empress twice so she had two names) encouraged the arts including printing. She imported woodblock printing from Korea so that she could make 1,000,000 copies of a Buddhist mantra. It was the first use of woodblock printing in Japan.
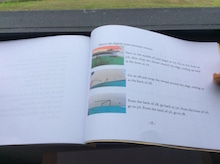 Between the two, printing and writing flourished and with that flourishment (?) came the need to bind the pages together. From that need came what is known as Japanese binding or watoji (和綴じ). Among the more popular watoji are the hemp leaf, the turtle shell, the noble, and the four-hole bindings. Here you can see the pictures that go with the tutorial. Or go down to Episode 133 and see them there, too. Fun, eh?
Thursday Jun 04, 2015
Thursday Jun 04, 2015
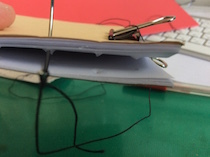
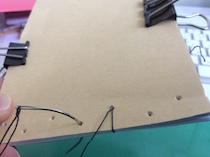
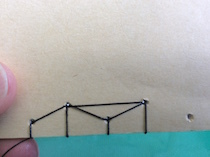
First, you’ll need some paper for the pages. The size is your choice but it should be thin. Hemp leaf binding ~ most Japanese bindings, in fact ~ favor thin pages and thin covers. Craft paper makes for a good cover as it is thick enough to be a cover yet thin enough to work properly. Then, get a scrap piece of paper the same height as your cover. On this scrap piece of paper we are going to mark the holes for stabbing.
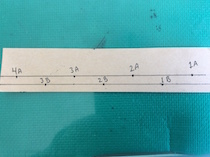
There will be seven holes. There will be two rows: one row will have four holes labelled 1A ~ 4A.; The other row will have three holes with clever names like 1B, 2B, and 3B. The row with four holes should be about 10 mm (a bit less than half an inch) from the edge. The row with three holes should be about 5 mm (half the distance from the edge to the row with four holes) from the edge. The distance between the holes should be the same.
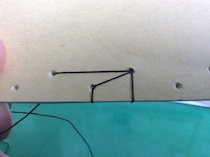
Let's start at the very beginning, which I'm told is a very nice place to start. The beginning is the hard part.
Here’s the short version:
Start at 2A. Wrap the thread around the edge at 2AHere’s the slightly more intimate version:
Go to 2B, wrap the thread around the edge (wrap)
Go back to 2A. From 2A front, go to 3A.
From the back of 3A, go to 2B.
From 2B go to 3A again and wrap the thread around the edge.
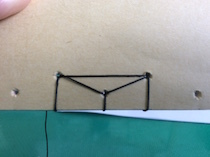
Go to 3B and wrap the thread.
Go to 3A. From the back, go to 4A.
From 4A go to 3B.
From the back of 3B go to 4A and wrap the thread around both edges.
Go to 3A. From the back of 3A, go to 2A.
From 2A go to 1B and wrap it.
Go to 2A. From 2A go to 1A and wrap it around the edge.
Go to 1B, then back to 1A, wrap it around the other edge. Go to 2A.
Tie it off at 2A.
Go to 2B and wrap the thread around the edge, ending up at the back of 2B.
From the back of 2B, go to 2A. From the front of 2A, go to 3A. From the back of 3A, go to 2B.
From 2B, go to 3A and wrap the thread around the edge.
Go to 3B and wrap the thread around the edge.
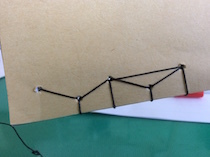
Go to 3A and from the back of 3A, go to 4A.
From 4A go to 3B. From the back of 3B, go to 4A
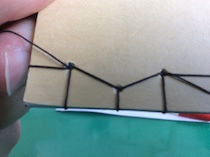
At 4A, wrap the thread around both edges.
From the front of 4A go to 3A.
From the back of 3A go to 2A.
From the front of 2A go to 1B. Wrap the thread around the edge.
From the back of 1B go to 2A.
From the front of 2A go to 1A and wrap the thread around one edge.
Go to 1B. From the front of 1B, go to 1A and wrap the thread round the other edge.
From 1A, go to 2A. Somehow find the end of the thread that’s in the middle and tie it off.
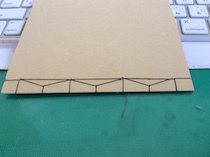
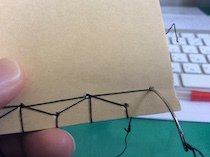
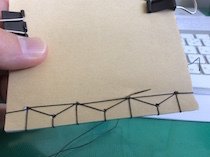
This should end up looking something like this. Hopefully, you'll be able to follow my instructions. If not, well, tell me about it.
But most of all, enjoy trying your hand at this binding, if you don't already know it.
Thanks for dropping by.